Connecting to IT Services Staff printers

The Networked Staff printers need to be set up for each person who logs into a PC. The process is quite easy (when it works) and we can set it up for you. However, there may be occassions when you are using a shared PC or that of a colleague, so I thought it would be useful to provide instruction for those who would like to try this themselves. Quict steps for connecting to a printer are listed below and a guide with screen grabs is also available (Connecting to IT Services Networked Printers).

  • Click on the Microsoft Button (Start)
  • Select ‘Devices and Printers’
  • From the devices and printers window select ‘Add a printer’
  • Select ‘Add a network, wireless or Bluetooth printer’
  • Select ‘The printer I want isn’t listed’
  • Enter the pathname of the printer (\printersStaff-Mono) then click ‘Next’
  • The drivers will be installed on the PC
  • The printer will be installed, click ‘Next’
  • Set at the default printer, print a test page (unless you are connecting to the A0 printer) and then click ‘Finish’
  • The printer appears in the ‘Devices and Printers’ folder and is identified by the green tick icon
  • Repeat the process to connect to the Staff-Colour (\printersStaff-Colour) or A0 printer (\printersA0_cc_plain_hp) and remember to un-tick ‘Set as the default printer

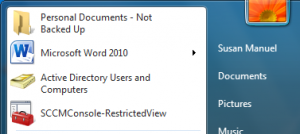
Quick access to regularly used programs

If you regularly use the same program every day, why not Pin it to your Start Menu or Task Bar. Locate the program in the All Programs list, Right click on the program and select Pin to Start Menu or Pin to Task Bar, easy peasy!

Start Menu

The Start Menu can be seen when you click on the Microsoft Button (Start)

 
Task Bar

The Task Bar is alongside the Microsoft button (Start) bottom left of your screen


Scanning directly to the LB-Shared-Drive

Normally when you scan documents on the print/copiers the files are sent as email attachments. This is fine when there are only a few documents to scan or if your email still below quota. But what happens if you have lots of scanning or no room left in your inbox.

Fear not!

Simply log on to the staff printer/copier (or the one in the Academic Services Team) as usual. Then do the following:

  1. Press the scan button on the console (this had a rectangular symbol with a line coming out of it)
  2. Click on the Folder tab on the touch screen
  3. By default documents will be scanned as black and white TIFF files, if you want something different then click on Scan Setting on the touch screen and make your selection
  4. Click on [00001] Library button on the touch screen

Now simply put your document under the glass or in the document feeder and click the green go button. The results will be uploaded directly to the “Store – Interim” on the LB-Shared-Drive. Files are named with the date and time that the scanning was done.

When finished scanning please click on the MENU and log off as usual.

Manipulating scanned PDF files

Have you ever spent the best part of an hour scanning an item for the e-reserve only to find out that you have missed a couple of pages out, scanned one in twice, and one has some missing text? Or, have you used our photocopier/printers to scan to email and wondered how on earth you are going to get all the individual pdf files into a single document? Well, all your troubles are over because now you can take a quick squint at the ‘Manipulating scanned PDFs‘ guide to find solutions to these common problems.