We’ve got an API…

APIs (application programming interface) are almost a way of life for us in MALS. They are an essential tool that allows us to exploit systems (I don’t mean in the sense of unfair or underhand access, but rather to derive maximum benefit from a system). However, time and time again we hit the problem of suppliers who proudly state they have APIs for their systems but when we ask to access them we find:

  • the APIs are unavailable to customers – but the supplier would be happy to do whatever development we were intending if we can provide them with a big bag of cash ($$$)
  • the APIs are undocumented – in other words no use at all
  • the APIs were documented – yeah! – about five years ago and despite the code being upgraded no one thought to do the same with the documentation – no!
  • the supplier is happy to provide access to the APIs for an additional charge
  • you need to attend a training course (and possibly be certified – I’ll let you decide on the definition) before you can access the APIs

<rant>
I can sympathise with suppliers not wanting people messing with their systems. However, if you say you provide APIs to access them then for goodness sake do so!
</rant>

Talking to Nessus 6 API

Nessus 6 has an exciting new API…. which means that systems that rely on the old XML API and things like Perl modules to encapsulate it are going to take a bit of work to port to the brave new world.  My chum Niraj is looking at doing that here, but wanted an example of the new API in use that he could build on.  Luckily I’ve done more Perl API hacking with JSON than a person should admit to, so it didn’t take long to knock one up for him.  I thought I’d share it here for other people’s edification (and also to stop Gary, my boss, saying that I don’t blog enough).

Hopefully the comments will help explain what is going on, but the over view is that the code is in two parts really. The first part creates a session for a given username and password. This gets given a token by the Nessus API server to say, “Yes, you’ve logged in”. This token is then used in a Custom HTTP Header in the second part of the example to request a list of scans. These come back in JSON format so we turn them into a Perl data structure using the JSON.pm Perl module and then do whatever funky thing we intended to do with the data. I hope that’s clear! 🙂

#!/usr/bin/perl

use strict;
use LWP;
use LWP::UserAgent;
use JSON;
use Data::Dumper;

# This line is a hack to deal with the duff SSL certificates on the test server
BEGIN { $ENV{PERL_LWP_SSL_VERIFY_HOSTNAME} = 0 }

# Where we talk to
my $apibaseurl = 'https://nessus.example.com:8034/';

# Get the username and password to use
my $username = shift || 'mrtester';
my $password = shift || 'testytesting123';

# Create a user agent (web browser) to talk to the Nessus server
my $ua = LWP::UserAgent->new;
$ua->agent("LboroScanHack/0.1");

# Create the POST request that encodes the username and password
my $req = HTTP::Request->new(POST => $apibaseurl . 'session');
$req->content_type('application/x-www-form-urlencoded');
$req->content("username=$username&password=$password");

# Make the request of the Nessus server
my $res = $ua->request($req);

# See if it worked and if so, get the session token
my $NessusToken = '';
if ($res->is_success) {
my $result = from_json($res->content);
$NessusToken = $result->{'token'};
} else {
print $res->status_line, "\n";
print $res->content;
print "\n";
exit;
}
print "Got a token of $NessusToken\n";

# OK, at this point we have a valid session token. We can now use this
# to make more requests of the Nessus server. Lets get a list of scans as
# an example. For these we're going to need to create a custom HTTP Header
# in the request called X-Cookie that includes the token we've just got.

my $h = new HTTP::Headers;
$h->header('X-Cookie' => "token=$NessusToken;");

# Now create a new HTTP request object for the method/URL we want that
# includes this custom header
$req = HTTP::Request->new('GET' , $apibaseurl . 'scans', $h);
$req->content_type('application/json; charset=UTF-8');

# Make the request to the server including the token.
$res = $ua->request($req);

# Didn't work? Explain why and exit.
if (!$res->is_success) {
warn $res->status_line, "\n";
warn $res->content . "\n";
exit;
}

# Still going so the request worked - convert the JSON content into a Perl
# data structure.
my $scandata = from_json($res->content);

# Print it out
print Dumper($scandata);

# Do some funky stuff with the data
foreach my $thisfolder (@{$scandata->{'folders'}}) {
print "$thisfolder->{'name'} is a $thisfolder->{'type'} with ID $thisfolder->{'id'}\n";
}

New frontend for Booking System

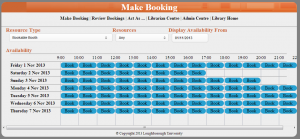
One of the summer tasks we have been dealing with has been to bring the frontend of our Web User Booking System (WUBS) up to date.  The original user interface dates back to when it was first developed (2005) and, while still more than adequate for the task, was starting to show it’s age.

Sample booking screen

After a short discussion in the team it was decided to follow a similar method to that which had been used for LORLS, specifically separating the front and back ends via a set of APIs.  The majority of the development effort was spent on the frontend as the core work on the APIs had already taken place to enable our mobile webApp to review, make and cancel bookings.

The key technologies behind the new frontend are HTML5 and JQuery.  Additional JQuery plugins used are DropKick, to provide the nice looking drop down lists, and Datepicker, for selecting dates from a calendar.

Lab Availability

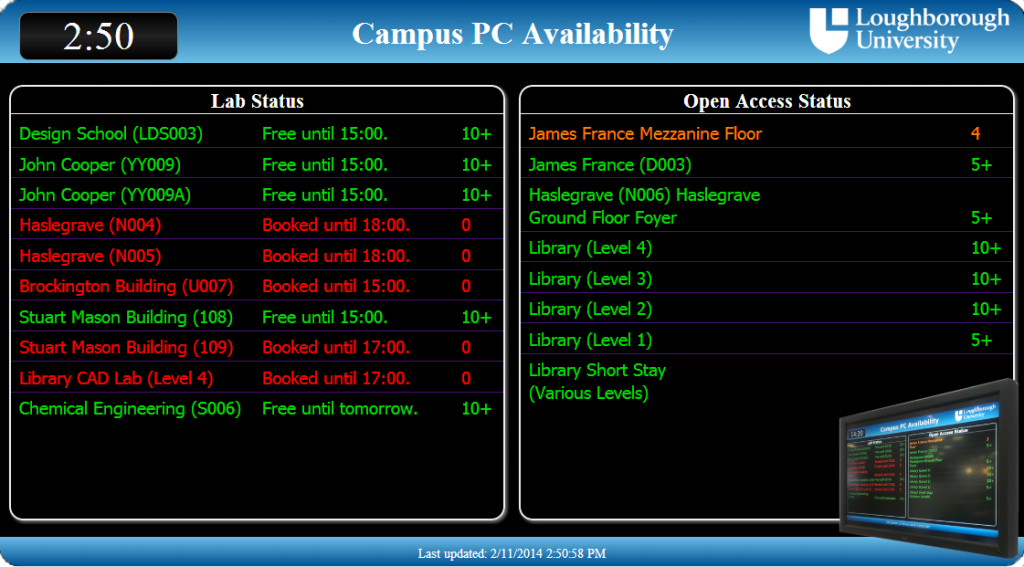
As part of the development of a student web information portal at Loughborough University a traffic light style widget, showing the usage of our computer labs, was posited. This would offer a number of advantages with students being able to chose the lab they would head towards by seeing those which were currently, or soon to be, booked and of the available ones which were busy.

Mash

The Active Directory (AD) was the first port of call for this. Each of our labs has their own organisational unit (OU), which contains all of the machines currently in the lab. The LDAP libraries of php could then be used to scoop up the AD computer object for each machine. An AD extension attribute on each managed computer was assigned and would contain binary data. 0 would indicate that the machine was not logged into and 1 would mean the machine was busy. Attribute control is handled by LDAP Modify commands that are run as part of the log on and off processes of the PC’s. By counting the number of zeros we could tell how many of a labs machines were currently free.

More mash

first_go

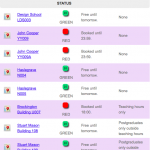
First attempt at the traffic light system

For those labs that are open access, the AD attribute control method offered all of the monitoring that was required. More work was required, however, on those labs that could be booked.

Therefore the second stage, was to question the University’s central timetabling system to see the status of the labs themselves. For this a database view was created, showing the status of the bookable labs throughout the day. SQL queries could now be sent to the view and the current and future status of the lab interpreted.

Mash with gravy

The Library uses a separate booking system (WUBS) for its seminar rooms and CAD lab. As these are not controlled from the central timetabling system, more mashup was required to connect to its API and once again poll for the daily booking data. Once this was achieved, it was simply a case of converting the WUBS API data into the same format as the central timetable data and output it all. This data could then be taken and combined with HTML5, to produce a unified traffic light display of availability throughout the campus (See our Digital Signage blog for the details).

pcAvailability

Pi and Mash. Raspberry Pi powered HTML5 mashup